
Dowels are a simple way to make glued joints even stronger by using small pegs to keep things together.
Creating dowel joints really boils down to three simple steps: aligning your boards, drilling holes for the dowels, and gluing everything together. It certainly seems like creating a dowel joint should be easy, but it requires a lot of patience and attention to detail to do one correctly.
To create the dowel joint, in addition to the pieces of whatever you’re building, you’ll need dowels, a drill, a square, wood glue, and clamps. I would also highly recommend a dowel jig and/or dowel centres.
Align The Boards

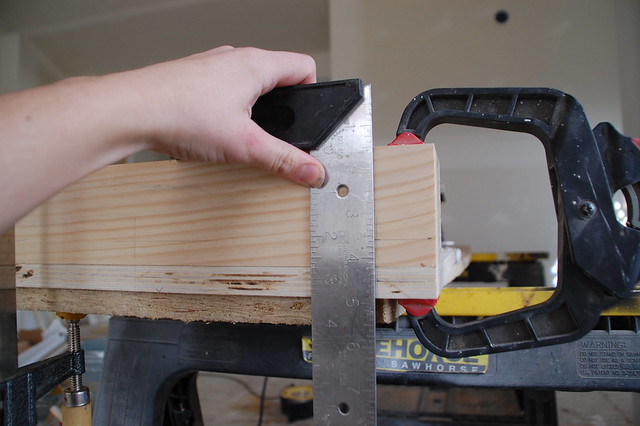
When creating dowels, I like to align my boards by clamping them together with the sides that will eventually have the holes facing out.
I mark the centre alignment of where I want the dowels on each board individually, and then use a square to mark the centre of each dowel on both boards.
While you can do this manually, this is also where the dowel jig comes in handy. A dowel jig will clamp on to your boards and move vertically between them, ensuring your holes are aligned between boards.

(Note: That was a cheap dowel jig I picked up at a hardware store. It worked OK but there are definitely better versions out there, if you’re planning to make a lot of joints this way.)
Drill Holes for Your Dowels

If you’re using a dowel jig this is easy enough. You can set the depth of your hole using a stop (usually included with the jig) or the age-old method of wrapping some tape around the drill bit.

The depth of the hole should be half of the length of the dowel (plus a little extra for glue); if you’re using a jig, you need to account for that as well.
A jig will help keep your bit square to the board when drilling which is key to making a dowel joint work. I tried freehanding these once and didn’t have much luck, but it could just be that I don’t have a steady hand.
If you’re not using this particular type of jig, this is where dowel centres come in handy. You drill the holes on one board, then put a dowel centre in the hole. Then you align the boards and press them together, and the dowel centre will leave a mark at the exact spot you need to drill on the opposite board.
Attach The Boards

You’ll want to dry fit the boards with the dowels first, to make sure everything lines up as expected. Once you’re sure the pieces fit together correctly, apply glue to the end of the dowels and insert them in the holes on one board. Then, apply a bead of glue along the entire length of the joint on the second board.

Knock everything together, and then clamp it up overnight to let the glue set.

This is one of those joinery techniques where every trick-of-the-trade comes in handy; if you have any great tips for dowel joints, let us know.
Comments
3 responses to “Joinery 101: How To Attach Boards With Dowels”
99% of Ikea use dowels, keep leftovers from finished products in case you break one
Or just pick up a pack of 50 from your local hardware store for $5…
Or buy a length of dowel and cut small dowels to size.
The purpose of the ‘fluting’ in ‘pre-made dowls’ is to allow for glue to surround the dowel in the hole, and to let excess glue out. Instead size your holes a fraction larger than the dowel (I normally used metric sized dowels, and then find an imperial drill bit that’s the slightest fraction larger). You can also cut a small kerf along the length of the dowel to provide a clear path for excess glue to escape.
Also, whenever glueing, use plenty. It’s cheap and adds a vast amount of strength to the joint. You want the entire surface to end up coated once the pieces come together. You’ll know if you’ve achieved this if you have squeeze out (excess glue) along the entire joint. If you don’t have squeeze out you’re not using enough glue.
Most wood glues can be easily wiped off with a wet rag. Or for particular work you can lay down some paints tape to remove the squeeze out (although leave it to partially set first to make removal easier).